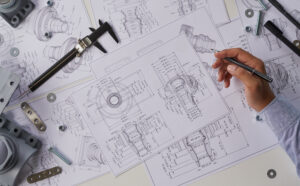
Modern CNC machining systems can interpret the geometry of a part directly from the 3D CAD file.
Technical drawings are not necessary to request a quote, but they are still very important and widely used in the industry, as they improve the communication of technical requirements between the designer/engineer and the machinist.
In this article, we will examine when and why you should include a technical drawing to your CNC order, we will break down the anatomy of a drawing and give you basic and advanced tips and guidelines for drawing one. There are also major differences between a 3D printing service and a CNC machining service and the technical drawings of these kinds of orders. This article only explains the drawings of CNC machining.
A well-designed, fully-dimensioned technical drawing is shown in the image below. By the end of this article, you will know how to read it and how to correctly prepare one yourself.
Why are technical drawings still important?
It is necessary to include a technical drawing to your order when your 3D CAD model includes:
- Threads (internal or external)
- Features with tolerances that exceed the standard
- Individual surfaces with specific finishing requirements (surface roughness etc)
These requirements cannot be conveyed in a 3D CAD file. Even if your design does not include the above, it is generally a good practice to accompany your 3D CAD file with a drawing when placing a CNC online quote or order. Usually, the 3D CAD file is used for programming the CNC machine and the drawing is used as a reference throughout the machining process. Most CNC service providers can also manufacture parts directly from a technical drawing and they often prefer them over 3D CAD files, because:
Prepare a technical drawing in 7 steps
Here is a summary of the steps you should follow when drafting your technical drawing:
Step 1. Define the most important views and place the relevant orthographic in the center of the drawing, leaving enough space between them to add dimensions.
Step 2. If your part has internal features or complex and difficult to dimension areas, consider adding section views or detail view accordingly.
Step 3. Add construction lines to all views. Construction lines include centerlines (to define planes or axes of symmetry), center marks, and center mark patterns (to define the location of the center of holes or of circular patterns).
Step 4. Add dimensions to your drawing, starting with the most important dimensions first (more tips on this are given in the next section).
Step 5. Specify the location, size and length of all threads.
Step 6. Add tolerances to features that need higher accuracy than the standard tolerance (in Hubs this is ±.125 mm or ±.005”).
Step 7. Fill in the title block and make sure that all relevant information and requirements that exceed the standard practices (surface finish, deburring etc.) are mentioned in the notes.
When your drawing is ready, export it as a PDF file and attach it to your order. Now that you are familiar with the basic structure of a technical drawing, let’s delve deeper into the specifics of adding dimensions, annotations and tolerances.
Rules in technical drawing
- A technical drawing is necessary when your part contains threads, tolerances or finishes on specific surfaces.
- It is recommended to fully dimension the technical drawing to avoid errors.
- To save time, you can dimension only the features you want to be measured by the CNC machining service provider.
Read more:
How to prepare a technical drawing for CNC machining


0 Comments